
My Equipment for Video, Audio, Podcasting, Streaming, etc.
Otherwise known as my overkill Zoom setup. Know from the start, doing any of this kind of setup will take more annoying fiddling than you expect. And yeah, there are some affiliate links, but only for products I’ve personally used and enjoy.
Many Questions
On countless Zoom calls, Google Meets, Slack Huddles, and Discord Video Channels I’ve been asked the question “Woah do you stream?” or “Woah do you have a podcast?”. While a podcast may come in the future, the equipment slowly appeared in my life over time.
Nonetheless, I’ve been asked specific details about my audio and video setups enough that I thought it would be worth documenting well so I can simply link it to other people.

My “battlestation”. Yeah, there’s wires everywhere, don’t @ me. The tripod used to be attached to the monitor arms until it broke recently.
How Did I Get Here?
I’d say an average software engineer has no need for most of this equipment, making it kind of weird that I have any of it, let alone all of it.
First, I bought a camera purely for my own enjoyment. My dad took photos with SLR then DSLR cameras my whole life, so one day with some big-boy job money I bought myself a mirrorless camera.
Next came some of the audio equipment. I enjoyed pub quizzes so much that I signed up to host them. After some time hosting, the quiz organization noticed I was pretty good at plugging in the audio cables; I’d worked around audio in the past, with plenty of friends in theater and live events. I became an audio inspector for new bars to figure out what equipment was needed and how to plug into the bar’s sound systems. I basically got paid a little gas money to drive around Virginia and try pub food.
Eventually, this left me with some piles of old audio equipment from bars that shut down. After playing with this for a while, I bought an audio interface of my own to play with higher quality audio recording at home. This is around the same time I bought better headphones.
Finally COVID happened, and my only non-work computer didn’t have a webcam or speakers. Picking up a cable and a cheap capture card from amazon turned my mirrorless camera into a webcam. Finally some audio monitors let other people hear the Zoom calls too.
Requirements
These products can really be mixed and matched. Having a nicer microphone can be great on it’s own. If you love photography, a mirrorless camera could be something you’ve already been thinking about. You don’t need any of these things, but they can demonstrate different categories you might be interested in upgrading for yourself.
This is just a list of fundamentals, I’ll go into details below.
Audio
A microphone. This is pretty obvious. It captures the vibrations of the air and turns them into an analog electrical signal.
A capture device. This is less obvious to most people. Some device, either your computer, some circuits in the microphone, or an external device need to turn the analog audio signal into a digital audio signal your computer can read.
Cables. You need some way to move the analog and digital audio signals around.
Mic stand. You don’t want to look like an MC at a high school awards ceremony holding a microphone all the time. Mic stands also help you move equipment out of the way quickly and safely.
Pop filter. A screen that prevents the percussive bursts of air from damaging or overdriving the microphone when you say words like “pop”. The screen just sort of slows down and diffuses the air. Some times they are a foam ball that comes with a microphone, other times they look like a circle in front of a microphone. You really need a pop filter.
Video
A camera. Again, this is obvious. Turns the light into digital data, though the kind of digital data can vary.
A capture device. Again, less obvious. Most webcams have hardware to turn their raw video signal into a more standard video codec that a computer can use. Some cameras (like DSLRs and mirrorless cameras) have proprietary capture software for their own codecs. There are also external capture cards designed to receive signals like HDMI and convert them into easier formats to store on a computer.
Cables. Welcome to a world of cables.
A tripod. Most laptop webcams are well placed so that it looks like you’re looking into the camera when you’re actually looking at the screen. A tripod of some kind will help you position the camera so it doesn’t always look like your distracted.
Recording Audio
Recording audio well can be difficult, and there’s a reason recording engineers exist. I am not a recording engineer.
At the end of the day, sound is an analog signal which can be uncomfortable to deal with in our digital world. This means our microphone on the input side and our headphones/speakers on the output side play critical roles in recording good audio.
Headphones
Why start with headphones? Imagine someone was playing your audio on car speakers, or in their home theater. If you want your audio to sound that good, you need to be able to actually hear it well. Headphones are the cheapest way to hear high quality sound and check your own audio.
I try to follow Adam Savage’s advice, phrased various ways at various times. The first time you buy a tool, buy the cheapest one; use it till it doesn’t work, then decide what you’d really like and buy a nice one.
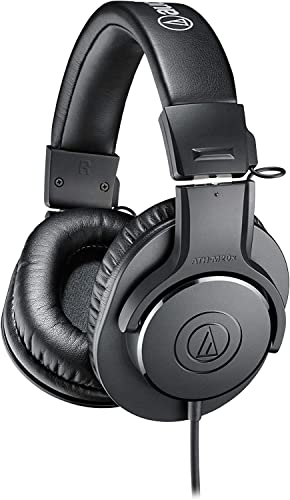
I started out with something like the Audio Technica ATH-M20X. You might not have heard of Audio Technica before because they don’t advertise very much. These $50 headphones compare to “name brand” headphones more than three times the price. If you look closely on studio recording videos, frequently you’ll see people wearing these because they’re cheap and replaceable with relatively high quality audio.
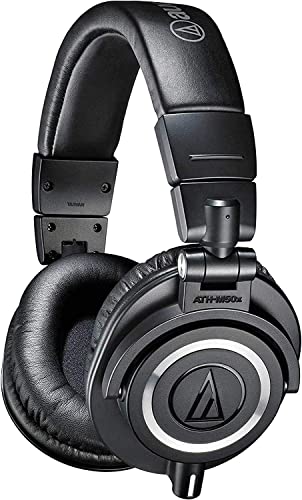
After a long life, they finally broke and I upgraded to the ATH-M50X. You’ll notice Audio Technica at least one more time in this post because they make high quality products at a great price. The newer headphones have slightly better specs and are slightly more comfortable which honestly matters more.
Microphone
There’s three basic categories of microphone (if you exclude the onboard microphone…).
The first are microphones that plug into the microphone or headphone port on your computer. You’re at the whims of your computer for how good this audio sounds, you typically have no control. These are totally fine. Typically, getting a microphone closer to your mouth improves sound quality the most, so just being able to move your microphone could give you better sound quality. I don’t know much about microphones in this category, just buy what you’d like.
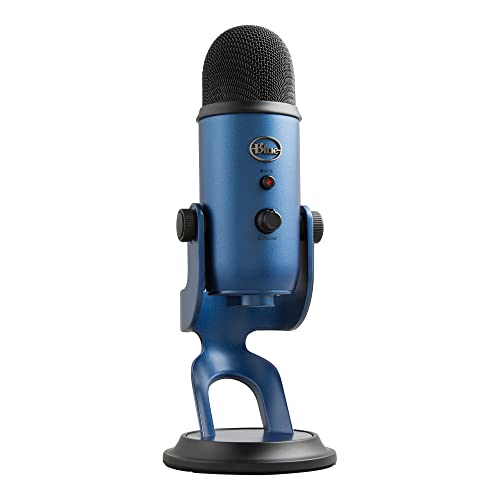
The next level of microphone typically connects with USB. The microphone contains the required electronics to convert the analog signal to a digital signal. They give varying amounts of control over the microphone itself and the digitization of the signal. The Blue Yeti microphone seems to be the standard in this category, and is a favorite of podcasters. These typically come with stands and make themselves easy to use.
The final tier of microphone uses a connection called XLR and is the industry standard for microphone connections. At this level, you will not only need a microphone, but will also need an audio interface which we’ll get to in a minute. These microphones are typically just sensitive analog instruments and should be treated carefully. They won’t typically come with a stand or all of the needed accessories. Your entering professional territory, even if you stay on the low end. This is where I landed on my journey, with an Audio Technica AT2020.
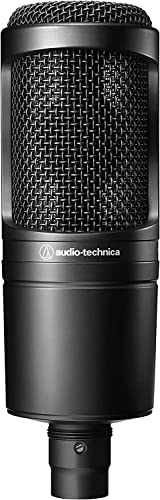
This condenser microphone will capture crisp, clear sounds near the microphone, but won’t be great once you get further away, or try to record two people at once. This works great for me, but there are tons of other microphone options that could work for you. If you made it this far, you may want to do your own research.
A Note on Mic Usage
Chances are high that you do not know how to use a microphone. Unless you’ve spent a lot of time with one or had someone teach you specifically, you probably haven’t developed a “microphone voice”. I’m not an expert on this topic, but as I mentioned above I spent a good amount of time as a pub quiz host with a microphone in hand. Even with built in microphones, a few things can help.
I’ve got a few tips.
Get close to the microphone. Uncomfortably close. This is the reason you see singers and radio hosts with their lips on the microphone. The closer you are, the stronger the sounds and the easier to capture them clearly.
Speak like your talking to a medium sized room, maybe a crowd of eight to ten people. While a good microphone can hear whispers and help you make ASMR videos, a little more volume makes your audio signal easier to pick up.
Figure out how to set your gains appropriately. Remember at the beginning when I said things could be fiddly? Gain is basically the amplification of your audio signal. There are a lot of places to adjust gain, but you want to make sure you have the gain closest to your microphone set high enough. You want to get as much signal to your computer as possible, but be careful. If you go beyond what the ADC can measure, you’ll get clipping.
Keeping your mouth close will get you a long way. Play around with your gain settings till things sound OK to you. Try putting everything at 0db or 100% and only increase the gain nearest your microphone. Again, I am not an expert, once you get here you’re diving into a deep world.
Audio Interface
You’ll only need an audio interface if your microphone is analog, and only has an XLR. These devices take the analog signal and turn it into various different bitrates of digital signal a computer can easily understand. They can do the same in reverse, taking the digital signals from your computer and smoothly converting them to analog. Typically the bitrate can be controlled by your recording software using normal device drivers.
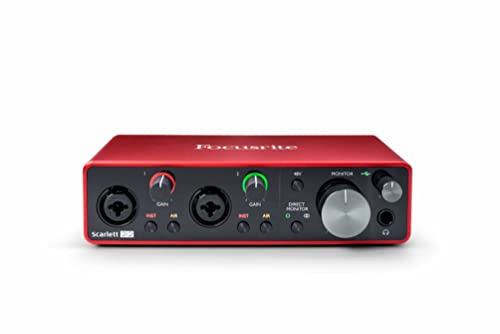
There’s a ton of options, so again, if you’ve made it this far you’ll want to shop around and do your own research. I ended up getting a Focusrite Scarlett 2i2 which has two inputs, and can handle 1/4” plugs from instruments in addition to XLR. It can provide the 48v phantom power that many microphones need, and you can monitor the audio live either through the headphone jack on the front or the monitor outputs in the back.
It works great, I don’t even know when or why I would need to upgrade it.
Audio Monitors
Sometimes I think they’re a little extra… my old PC speakers broke long ago and I decided to replace them with studio monitors. Studio monitors are basically normal speakers, but with a very flat frequency response to accurately reproduce audio. Not really necessary, but gives you an additional way of checking audio other than your headphones. Sometimes things sound good in headphones and good equipment that don’t sound good through stereo speakers. I’ve even heard professional producers check their mixes in cars just because it can sound so different.
Anyway, I just grabbed some pretty basic monitors off of Amazon.
Audio Accessories
XLR cable, if needed, to connect mic to interface
1/4” cables for connecting monitors to audio interface. These have nice 90 degree ends and are short so I can keep my interface near the monitor
pop filter I currently use, but I used to have this one which was fine. These keep you from clipping on the audio interface when you make plosive sounds like P and F
microphone arm. I used to have a cheap one, it broke immediately and was too small and I struggled with it for years. Then I got this one, and it’s worth the extra dollars. Because it’s larger, the microphone can be moved further out of the way.
monitor pads help isolate the vibration caused by the monitors, and can help point your speakers towards your head if they sit directly on your desk.
Recording Video
Again, I am not an expert in recording video, I just know enough to stumble through. The two best tips I have are to make sure you have enough light, and enable HD video in whatever video call software you’re using. By default they reduce the quality because they know most people’s camera and internet are junk. But if you have good internet and an OK camera, flip these settings on. With enough light, even mediocre cameras can use settings that produce pretty good video.
Camera
In this category, you could spend literally as much money as you want, from $20 to more than $20k. You’ve got to make a few basic choices. Do you want to record only 1080, or do you want to record 4k? Are you ok with just a stationary webcam, or are you trying to record video outside, moving around, etc.?

If you already have any kind of digital camera, chances are good that it can already be used as some sort of webcam. My Fujifilm camera has a piece of software that allows the camera to connect over USB. In my experience, this was a little flaky. The camera also has an HDMI output to monitor the video live. You might have to flip through some settings on your camera to have the video show up without any data on top of the image.
A full digital mirrorless camera is definitely overkill, but it’s something I already had on hand, and it’s a common upgrade for many videographers.
I think it’s rarely mentioned how much lenses affect your video quality. There are physical constraints on how light can be captured based on the physical dimensions of a lens. Forgive my crude simplification, but larger lenses capture more light and more light means better video. A camera with changeable lenses will give you more options for what your video looks like. Better lenses and cameras also capture better video in lower light conditions. Smartphones use a lot of software to merge data together, but a larger lens always means more data.
Capture Card
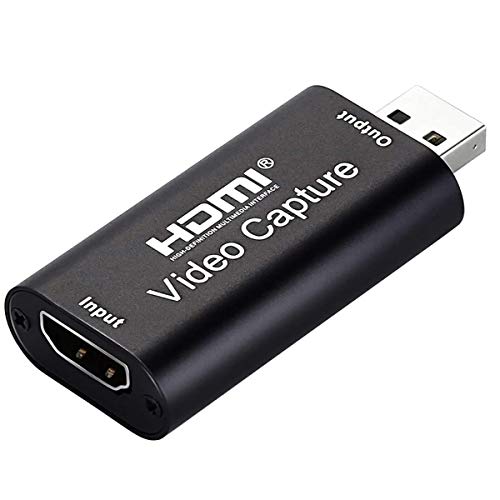
When COVID hit and I found my primary computer lacking a webcam, I found Fujifilm’s software to connect over USB. It worked OK, but required changing settings on the camera and frequently shut down on its own.
A USB capture card removes special software from the equation. Most mirrorless or DSLR cameras have some kind of HDMI output for live video monitoring. The USB capture card can turn this HDMI video signal into a webcam device on your computer. I’m sure there’s plenty of options here, but this simple option from has been working extremely well for me.
Software
If you’re trying to record video not just do fancier Zoom calls, OBS Studio would be a good place to look. It lets you mix and overlay your video and audio, create “scenes” that are combinations of various video and audio sources, and transition between them.
This seems to be the go-to entry level software for streaming. On top of all that, it’s free and open source.
I’m still looking into video editing software, but that’s beyond the scope of this post…
Video Accessories
Tripod — I just upgraded from one of the short bendy leg tripods. If you’re going to get a bendy leg tripod, get a good one. Mine was hard to use and broke quickly. This tripod is maybe overkill… but I want to have the option of attemting panning shots.
Lights — I don’t have any yet. My camera does OK in low lights, and my desk is relatively well lit. Ring lights are popular and help create a flatter light and fewer shadows. There’s a bunch of other light options as well, but the most important thing is getting enough light.
Micro HDMI cables — for connecting some SLR and mirrorless cameras to capture cards.
Conclusion
There’s a bunch of ways to upgrade your desktop audio video setup. You don’t have to do it at all, but if you want to upgrade expect to learn a lot.